Nginx是一个高性能的Web和反向代理服务器, 它具有有很多非常优越的特性。作为Web服务器:相比Apache,Nginx使用更少的资源,支持更多的并发连接,体现更高的效率,能够支持高达50,000个并发连接数的响应。本文讲解以源代码编译的方式安装Nginx网页服务器。
安装环境
[admin@ityoudao ~]$ uname -r
3.10.0-693.2.2.el7.x86_64
[admin@ityoudao ~]$ cat /etc/redhat-release
CentOS Linux release 7.6.1810 (Core)
安装Nginx依赖的库文件
- PCRE库
PCRE(Perl Compatible Regular Expressions,perl语言兼容正则表达式)是一个用C语言编写的正则表达式函数库,由菲利普.海泽(Philip Hazel)编写。PCRE是一个轻量级的函数库,比Boost之类的正则表达式库小得多。PCRE十分易用,同时功能也很强大,性能超过了POSIX正则表达式库和一些经典的正则表达式库。安装PCRE库使Nginx支持具备URI重写功能的rewrite模块http_rewrite_module。
Zlib库 Nginx gzip压缩模块http_gzip_module模块提供了压缩文件内容的功能,用户请求的内容会被压缩之后再发送到客户端,不但可以节约网站的出网带宽,而且加快数据传输效率可以提升用户的访问体验,此模块需要安装zlib库。
OpenSSL库 Nginx使用HTTPS服务的时候需要http_ssl_module模块,此模块需要安装OpenSSL库。
使用下面的命令安装上面的三个库文件:
[admin@ityoudao ~]$ sudo yum install pcre-devel zlib-devel openssl-devel
编译安装最新稳定版Nginx软件
访问Nginx官网 http://nginx.org/ 下载最新稳定版Nginx源码:
[admin@ityoudao ~]$ sudo mkdir -p /u01/{app,data,log,src}
[admin@ityoudao ~]$ sudo chown admin:admin /u01/{app,data,log,src}
[admin@ityoudao ~]$ cd /u01/src
[admin@ityoudao src]$ wget http://nginx.org/download/nginx-1.14.2.tar.gz
[admin@ityoudao src]$ tar -zxf nginx-1.14.2.tar.gz
修改源码隐藏Nginx软件名称和版本号,就叫ityoudao Web Server,简称IWS吧,版本号0.0.1:
[admin@ityoudao src]$ cd nginx-1.14.2
[admin@ityoudao src]$ sed -i '{
s!#define NGINX_VERSION      "1.14.2"!#define NGINX_VERSION      "0.0.1"!g
s!#define NGINX_VER          "nginx/" NGINX_VERSION!#define NGINX_VER          "IWS/" NGINX_VERSION!g
s!#define NGINX_VAR          "NGINX"!#define NGINX_VAR          "IWS"!g
}' src/core/nginx.h
[admin@ityoudao src]$ sed -i 's/ngx_http_server_string\[\] = "Server: nginx"/ngx_http_server_string\[\] = "Server: IWS"/g' src/http/ngx_http_header_filter_module.c
编译安装Nginx:
[admin@ityoudao nginx-1.14.2]$ ./configure --user=nginx --group=nginx --prefix=/u01/app/nginx-1.14.2 --with-http_ssl_module
...
Configuration summary
  + using system PCRE library
  + using system OpenSSL library
  + using system zlib library

  nginx path prefix: "/u01/app/nginx-1.14.2"
  nginx binary file: "/u01/app/nginx-1.14.2/sbin/nginx"
  nginx modules path: "/u01/app/nginx-1.14.2/modules"
  nginx configuration prefix: "/u01/app/nginx-1.14.2/conf"
  nginx configuration file: "/u01/app/nginx-1.14.2/conf/nginx.conf"
  nginx pid file: "/u01/app/nginx-1.14.2/logs/nginx.pid"
  nginx error log file: "/u01/app/nginx-1.14.2/logs/error.log"
  nginx http access log file: "/u01/app/nginx-1.14.2/logs/access.log"
  nginx http client request body temporary files: "client_body_temp"
  nginx http proxy temporary files: "proxy_temp"
  nginx http fastcgi temporary files: "fastcgi_temp"
  nginx http uwsgi temporary files: "uwsgi_temp"
  nginx http scgi temporary files: "scgi_temp"
[admin@ityoudao nginx-1.14.2]$ make && make install
[admin@ityoudao nginx-1.14.2]$ cd /u01/app && ln -s nginx-1.14.2 nginx
创建运行Nginx的用户并检查Nginx配置文件
首先创建运行Nginx的用户nginx:
[admin@ityoudao app]$ sudo useradd -s /sbin/nologin -M nginx
检查Nginx配置文件:
[admin@ityoudao ~]$ sudo /u01/app/nginx/sbin/nginx -t
nginx: the configuration file /u01/app/nginx-1.14.2/conf/nginx.conf syntax is ok
nginx: configuration file /u01/app/nginx-1.14.2/conf/nginx.conf test is successful
- 提示“syntax is ok”和“test is successful”说明配置没有问题。
遇到的问题和解决方法
1)nginx: [emerg] bind() to 0.0.0.0:80 failed (13: Permission denied)
解决方法:Nginx绑定80端口需要root权限,如果使用普通用户启动nginx需要使用sudo命令。
2)nginx: [emerg] getpwnam("nginx") failed
解决方法:配置使用nginx用户启动Nginx,如果不存在nginx用户,则会出现该错误。
配置Nginx启动项
CentOS7使用Systemd管理服务,创建nginx.service以便使用Systemd管理nginx:
[admin@ityoudao ~]$ sudo vi /usr/lib/systemd/system/nginx.service
[Unit]
Description=nginx - high performance web server
Documentation=http://nginx.org/en/docs/
After=network.target remote-fs.target nss-lookup.target
[Service]
Type=forking
ExecStartPre=/u01/app/nginx/sbin/nginx -t
ExecStart=/u01/app/nginx/sbin/nginx
ExecReload=/u01/app/nginx/sbin/nginx -s reload
ExecStop=/u01/app/nginx/sbin/nginx -s quit
PrivateTmp=true
[Install]
WantedBy=multi-user.target
设置Nginx开机自动自动:
[admin@ityoudao ~]$ sudo systemctl enable nginx.service
Created symlink from /etc/systemd/system/multi-user.target.wants/nginx.service to /usr/lib/systemd/system/nginx.service.
启动Nginx并检查运行状态:
[admin@ityoudao ~]$ sudo systemctl start nginx.service
[admin@ityoudao ~]$ sudo systemctl status nginx.service
● nginx.service - nginx - high performance web server
   Loaded: loaded (/usr/lib/systemd/system/nginx.service; enabled; vendor preset: disabled)
   Active: active (running) since 四 2018-12-13 21:42:52 CST; 19s ago
     Docs: http://nginx.org/en/docs/
  Process: 23175 ExecStart=/u01/app/nginx/sbin/nginx (code=exited, status=0/SUCCESS)
  Process: 23173 ExecStartPre=/u01/app/nginx/sbin/nginx -t (code=exited, status=0/SUCCESS)
 Main PID: 23178 (nginx)
   CGroup: /system.slice/nginx.service
           ├─23178 nginx: master process /u01/app/nginx/sbin/nginx
           └─23179 nginx: worker process
12月 13 21:42:52 ityoudao systemd[1]: Starting nginx - high performance web server...
12月 13 21:42:52 ityoudao nginx[23173]: nginx: the configuration file /u01/app/nginx-1.14.2/conf/nginx.conf syntax is ok
12月 13 21:42:52 ityoudao nginx[23173]: nginx: configuration file /u01/app/nginx-1.14.2/conf/nginx.conf test is successful
12月 13 21:42:52 ityoudao systemd[1]: Started nginx - high performance web server.
检查Nginx监听状态:
[admin@ityoudao ~]$ sudo netstat -lnpt|grep nginx
tcp        0      0 0.0.0.0:80              0.0.0.0:*               LISTEN      23178/nginx: master
使用浏览器访问http://ecs_external_ip,检查网页能否正常访问!
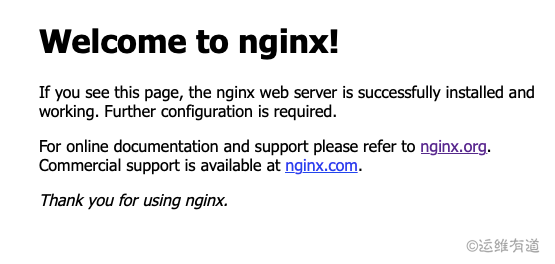
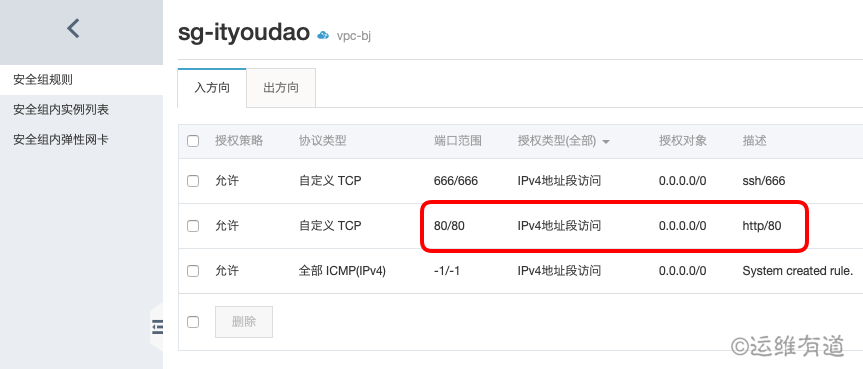
如果无法访问,检查主机防火墙、SELinux和阿里云ECS的安全组是否配置正确。这里没有开启主机防火墙和SELinux,ECS的安全组入方向需要放行tcp/80,如果开启了HTTPS还需要放行tcp/443。
Nginx服务器安装完成,暂时使用之前安装的MySQL数据库,下一步安装PHP。